Friday, April 11, 2014

DIY Spring Wreath

Last night, I had the rare opportunity of having nothing to do. The husband was out bowling and I was caught up on all of my homework. What better way to celebrate this free time than making a spring wreath?!

The weather here in Western New York has been brutal. I swear this was the longest winter that I have ever experienced. This past week, though, AMAZING! It's been in the fifties and sixties all week, which pretty much feels like summer time after five months of negative temperatures.

I stopped in Michaels with no intention of making anything. Sometimes, I just like to walk around and enjoy the peacefulness. But if any of you have been in Michaels recently, there is Spring everywhere! There were so many beautiful Spring wreaths, but most of them were at least $50. There was no way that I was going to pay that much for a wreath. I knew I could make one for half that price.

I grabbed all of the items that I needed (a grapevine wreath, fake flowers in white and orange, small burlap flowers, and a huge letter H). Everything ended up being $17, what a steal! After some hot glue and wire, the wreath was complete!


It took a little while for me to arrange the flowers exactly how I wanted them before gluing them on. I also painted the letter H. It was originally all white, but our front porch decorations are orange and navy so I wanted to incorporate the navy somewhere.

I think it turned out really cute! Definitely way better than spending $50. I'll post a picture of the new Spring wreath on the front door soon. I'm working on repainting the front door right now, so I want to wait until it's all done!

Friday, April 4, 2014

Our Wedding Details

Wow. It's been a really long time since I've updated my blog. I guess life got in the way. I am teaching full time now, while still getting my graduate degree. You could say that I'm a little bit busy. I've lost touch with the things that make me happy, my hobbies. I vow, from here on out, to post regularly. There's something about sharing the little moments in life that make me happy.

After a wonderful sushi date with my husband tonight, I decided to take a look at our wedding pictures. Nine months later, I'm still so happy with them. My photographer was able to capture every single little detail about our special day. Here are a few of the details that really pulled the event together.


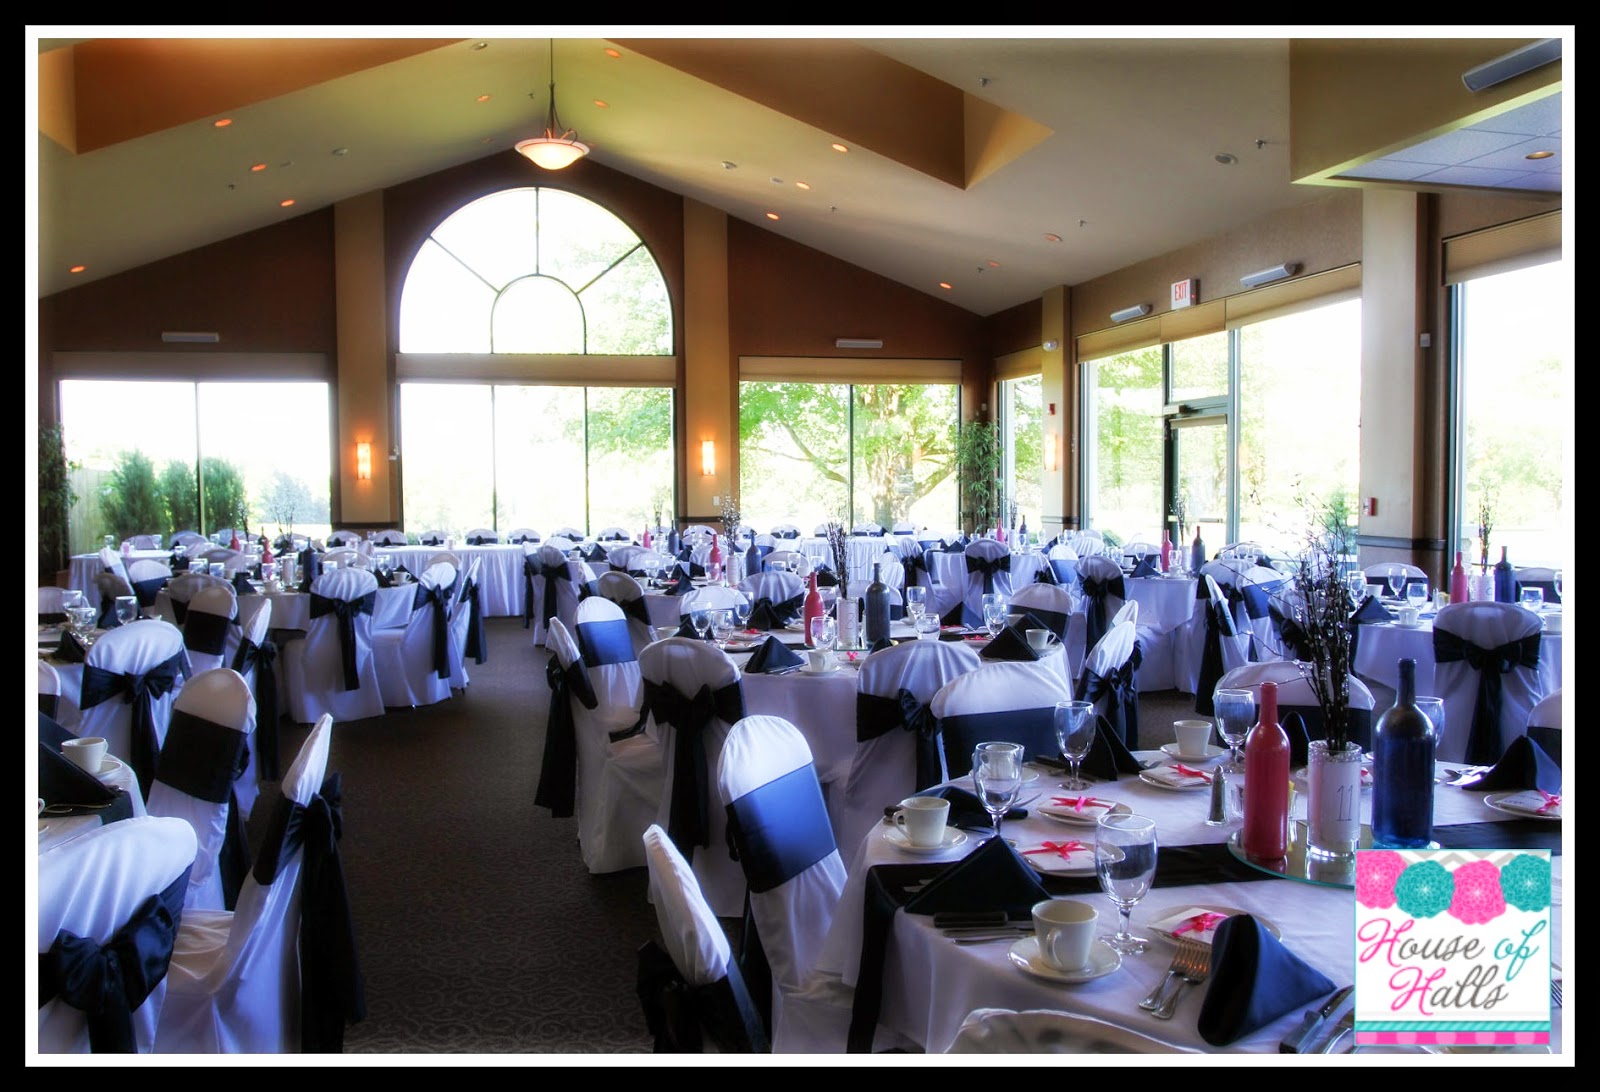
As you can tell, our colors were navy and pink. I loved this color combo! It was definitely summer appropriate. Our entrance table included our card holder, guest books, seating assignments, and other cute decorations. Our card holder is made by your truly. I had a great time with my girlfriend Meaghan making this out of fabric and hat boxes. Our guest books are actually Shutterfly photobooks. There is a format that you can choose that allows you to enter message pages for guest comments: perfect! This table was the first think that you saw as you entered the reception hall, and it definitely gave the right impression.

Our reception hall is simply breathtaking. It is a golf course that my husband's family is very involved with, so we knew we wanted to get married there as soon as we got engaged. The entire night was perfect!

I hope these pictures give you some DIY ideas for your own wedding. Thanks! 
 

Sunday, October 13, 2013

Our First Look

For our wedding day, we decided to see each other before hand. Not only did we want to eliminate the stress related to that, we also wanted to spend a private moment together before all of the craziness ensued. Our photographer caught our moment, and it truly was beautiful. [Photography by Kristen Hamm Photography]


This moment was special to us both. Before we saw each other, David's groomsmen came over to tell me that David was so nervous. It was so cute seeing him nervous, because that never happens! If you are planning to see your groom before the wedding, I highly recommend doing a first look. You both still get that private, awe-inspiring moment that you'll remember forever.
 

Wednesday, October 9, 2013

Yellow and Grey Guest Bedroom

Since I showed y'all the first finished guest bedroom, I figured I could show y'all the second (and final) finished guest bedroom.  I've seen so many ideas of combining yellow and grey, it inspired me to use these colors in this room.  Everything in this room is not new, but new to us.  I love to go estate sale shopping on the weekends; I always find awesome deals on the most random things.  One weekend, I purchased the entire bedroom set used in this room for only $40.  When I bought it, the whole set was this horrible, dull yellow.  I purchased some spray paint and went to town.  They turned out great!  The bed frame and the dresser are painted flat black, while the nightstand is painted yellow.  Just the perfect pop of color that this room needed.


The only thing that I am not happy with in this room is the wood trim.  It clashes with the colors of this room a lot, more so than in the orange and brown room.  I want to paint it white in the entire house, but I'm on the fence about it.  In one hand, it would definitely modernize the entire house.  On the other hand, it is real wood and I would be taking away from the integrity of the house.  What do you think? Paint it or leave it?
 

Tuesday, October 8, 2013

Orange Guest Bedroom

When we first bought our home, it was pretty much a blank slate.  We've been working extremely hard to get it to exactly how we want it, but it's a long and expensive process.  One of the easiest rooms to do in our house were the guest bedrooms.  Today, I'm going to show the end result to what we call our orange bedroom.  Everything in this room is used, from our old apartment in Detroit.


We're not afraid of using bold colors, obviously!  David wanted to paint the whole room orange, but I thought that would just be way too much bold color so we settled on an accent wall.  I love the color, it matches everything else in the room so perfectly.  I'm very happy with the way this turned out.
  

Friday, October 4, 2013

Honoring A Lost Life

A few days after coming home from our honeymoon, David's mom (Judi) suffered a massive stroke.  The doctors said that there was nothing they could do, so we prepared to say goodbye to such a beautiful and amazing woman.  She had been battling stage four cancer since January, and we all believe that she was just tired of fighting.  This was, by far, the hardest thing I have ever had to do in my entire life.

David always said that I was exactly like his mother, so he wanted me to use my crafting skills in some way to honor her.  Judi loved scrapbooking, just as much as I do, so I decided to make two shadow boxes dedicated to her life.  I had fun picking out the items that would go into the shadow boxes.  Anything that reminded me of her, I knew I had to find a place for it.  She was a teacher, a mother, a bowler, a golfer, a Disney lover, and a crafter.  She had the most vibrant personality that you would ever meet in your life.

Here's how they turned out:


I love them.  I have them hanging over my desk in our office.  I use them as motivation while I'm doing my schoolwork.  She was a teacher for thirty years, and I can only hope that I will be half the teacher and woman that she was.  Love you and miss you Judi.
 

Thursday, October 3, 2013

My Bridal Shower

My bridal shower was held at the Clarion Hotel here in our town.  We looked at multiple places, but the Clarion offered everything that I wanted at a reasonable price.  We booked a room that held about 40 guests.  We chose a buffet style brunch and of course we had mimosas!  Three of my bridesmaids decorated the entire room for me, and they did a wonderful job.  The centerpieces looked even better than I had imagined.  For the favors, one of my bridesmaids made homemade chocolate molds in wedding themed shapes (they were a huge hit).  Here are some pictures from my event:

The table settings and centerpieces.

My mother-in-law, me, and my mom. Beautiful women.
Dessert table with cupcakes.
Recipe cards and game instructions.
My bridal shower turned out beautiful.  I am so lucky to have such caring people in my life that could make this happen.  Thank you, you know who you are.
 

Fall Themed Front Porch

Fall is my favorite season of them all. I love sweaters, apple cider, baking, Halloween, the color change of the leaves, EVERYTHING!! I enjoy decorating according to the season, so I went out and purchased some items to spruce up our front porch. 


Most of everything that I bought was on sale or clearance.  I got the pumpkins for $5 each at Walmart.  They were cheaper than any of the nurseries in our town.  The mums were purchased two weeks ago from a trip to a local cider mill.  I got them both for $12, which is a steal because they are full and beautiful.  The orange pots were purchased at Michaels for $2 each (they were on clearance from the summer).  All of the other items (tombstones, garland, scarecrows, etc) were purchased from the Dollar Tree.  Believe it or not, they actually have a ton of holiday themed items.
 

Saturday, March 30, 2013

Will You Be My Bridesmaid?

I made these "Will You Be My Bridesmaid" kits back when I first got engaged, but never got a chance to send them out because we moved and I somehow misplaced them all (bummer)! However, I really think they turned out adorable and wish that I could have sent them out to my girls.


The kits are comprised of frames, personalized wine glasses, cork coasters, and a note. I painted the wine glasses myself, first time I've ever painted on glasses. I made them reflect the bridesmaid dresses and then added their initial. I used Folk Art acrylic paint and it did well on the glass. I also made the cork coasters out of Barefoot Wine corks (my favorite wine, ever). I just hot glued the corks in the design I wanted and added a little bit of ribbon for decoration.


 So sad that I wasn't able to send these out. Cute project, though!


Friday, March 29, 2013

DIY Bridal Shower Centerpieces

Something important that y'all should know about my life: Thursday nights are always girls nights at my house. We normally drink wine, cook dinner, and do crafts (fun night, right?). This past Thursday, one of my wonderful bridesmaids, Julie, came over to help create the bridal shower centerpieces.

I had no idea what I wanted to do, I just knew that I wanted it to be simple with a little bit of drama. I've been looking at a lot of ideas on Pinterest (of course) and I noticed that I liked the look of vases with ribbon.

I was lucky enough to inherit about 50 vases from a girlfriend who got married last summer. She just gave them all to me. Well, there were ten of one certain type, so we choose those to use as the centerpieces, since we didn't need that many. The rest will be used for the wedding centerpieces (post to come soon, just started working on them!).

I went to Michaels and bought thick white ribbon, and skinny navy and pink ribbon (our wedding colors). I also picked up some pink daisies. I only spent $10 at Michaels because I had a 30% off coupon. I had previously purchased a large amount of silver willow branches from someone on Craisglist for only $30. I swear, coupons and Craigslist is the way to go. I never buy anything at Michaels without a coupon, because they send me them every week. And you can find the most random things on Craigslist. Never rule out anything you see on there, because you can turn anything into something.

We hot glued the ribbon to the vases and then added the daisies. Then, we cut the willow branches to the length we wanted and viola! Here's the result:


The only thing that I need to do is re-paint the willow branches silver. The paint chipped on all the ends from cutting it. But, that will be easy! I just love them. They will be bright and add the drama that I'm looking for. Hope y'all like!